Managing users effectively is crucial for the success of any project management tool. Within our Bizman platform, adding, editing, and deleting users ensures efficient workflows, accurate task allocation, and robust security.
Admins or Bizman users with Add Users, Edit Users, and Delete Users permissions can perform these functions. In this guide, we will walk you through the process of adding, editing, and deleting users within Bizman.
Note: It is essential to have at least one user and one client set up in the system before initiating any task creation, work logging, or timer activation.
First off, here's why adding, editing, and deleting users is important for task management, time management, and password management tools:
1. Accuracy and Efficiency:
- Having accurate and up-to-date user information ensures tasks are assigned to the right people with the relevant skills.
- By easily adding new users, you can quickly integrate them into tasks without delays.
- Editing user details allows for changes in roles, departments, or skills, keeping task assignments optimized.
- Deleting inactive user accounts removes clutter and ensures only authorized users have access to tasks and tools.
- Assigning tasks to the right people based on their skills and availability leads to better time management.
- Removing inactive users prevents wasted time spent assigning tasks to unavailable users.
Moreover, in terms of platform security, deleting inactive user accounts removes access to sensitive data and projects, reducing security risks. Essentially, managing user access effectively through adding, editing, and deleting accounts is crucial for getting the most out of task management, time management, and password management tools.
Step 1: Accessing Users section within Bizman:
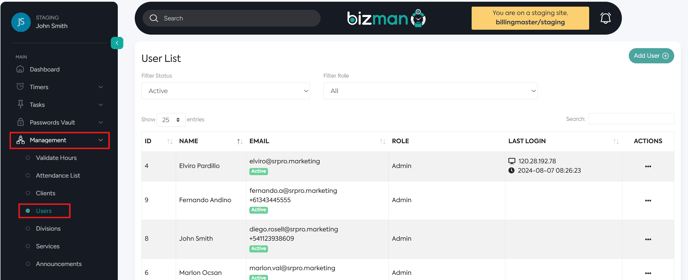
Navigate to the Side Bar menu and select “Management”. From the “Management” section, click on “Users”.
Step 2: Adding a New User:
Once you clicked on Users, you will be directed to the User List page. From there, click on the prominent "Add User" button on the upper right side. Enter the details as follows:
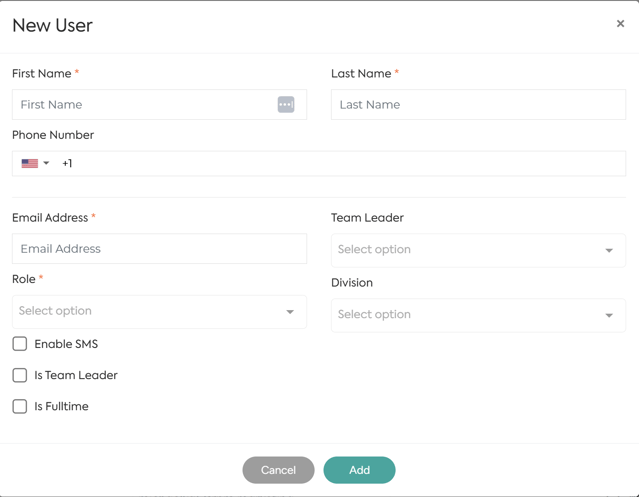
- User First and Last Name
- Phone Number
- Email Address
- Team Leader – Check the ‘Is Team Leader’ checkbox below if the new user will be designated as a Team Leader. Otherwise, choose the appropriate Team Leader from the dropdown menu to assign the new user under their supervision.
- Role - The Role field lets you specify the level of access based on predefined role permissions for the new user. Select the role that best suits the responsibilities and requirements of the user's position.
- Division - The Division field helps organize and segment users based on specific criteria such as geographic location, field, or industry. (Click here to learn how to add division)
- Is Active – This determines whether the user's account is active or inactive within the platform. When checked, it indicates that the user is currently active and able to access the system. Unchecking it marks the user as inactive, restricting their access until reactivated.
- Enable SMS - When enabled, users may receive important updates, notification, or alerts via SMS (Short Message Service).
- Is Full Time - When checked, it indicates that the employee's position entails working a standard full-time schedule.
Click "Add" to confirm the addition of the new user to the platform.
Step 3: Editing User Details:
Find the user whose details you wish to edit within the User List table. Click on the three dots icon and select “Edit” from the dropdown.
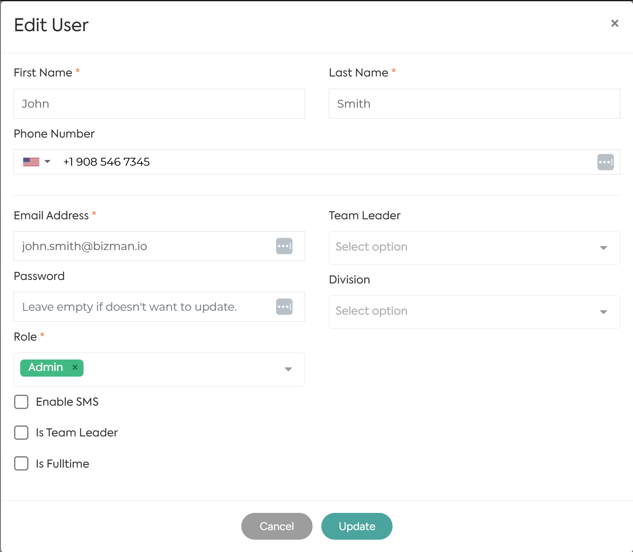
Update the necessary fields with the new information. Review the changes and ensure accuracy. Click "Update" to confirm the edits and apply the changes to the user's profile.
Step 4: Deactivating a User:
Find the employee you want to deactivate within the User List table. Click on the three dots icon and select “Deactivate” from the dropdown. Confirm the action by clicking “OK” to verify that you intend to deactivate the user.
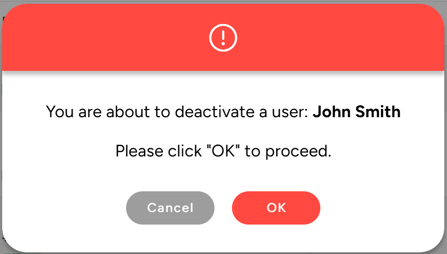
Once confirmed, the user will be removed from the platform, and their access privileges will be revoked.
Note: Exercise caution when deactivating users, as this action may impact ongoing tasks and project assignments.
If a user has any active tasks assigned to them, you have the ability to reassign these tasks to another active user. This is easily done by selecting the desired user from the dropdown menu.
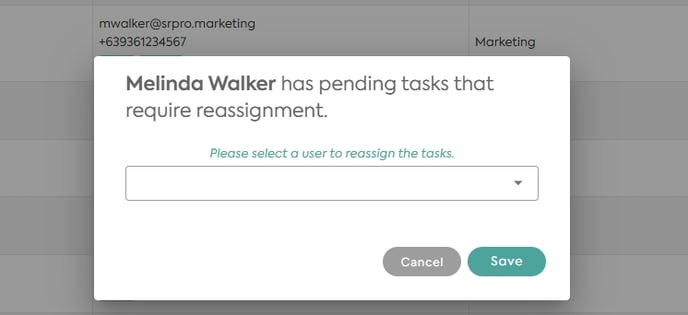
This way, you can maintain workflow efficiency and ensure tasks are handled without delay if the original assignee has left or gets deactivated.
Overall, effectively managing users within Bizman Business Management tracking is essential for optimizing team performance and achieving success in task management.